When in Rome
I nerded out much of the design on my iPad.
We had the 4 panels from the deconstructed array. They were fine.
Each solar panel is 96" by 51" including their connecting pipes.
I'm an artist.
OK, need a frame that is roughly 96" x 204" and the panels need to point south to maximize exposure to sunlight. The old ones do.
I will need to build the new array along the hillside just below the old array with a gap between so I can more easily service both of them.
The rack will need to be built mostly with pressure treated 2x4's tied to 4x4 posts imbedded in concrete.
Of course I jumped in and started to lay out the rough location of the new posts. Kathleen and Kelsey cleaned out the space.
I did some estimates of where the posts would sit based on the design of the frame.
Thus the posts ought to be about 4" inside the outside edge of the frame design. But I also added a gap because the posts will be at an angle and not flush to the corners (and this isn't like I'm launching the space shuttle) so I went with the centers of the posts being 86" apart. Close enough for now so that I could map out the post holes.
Rick had also suggested making the array a bit wider than 204" so that the piping could rest on the ends for better support.
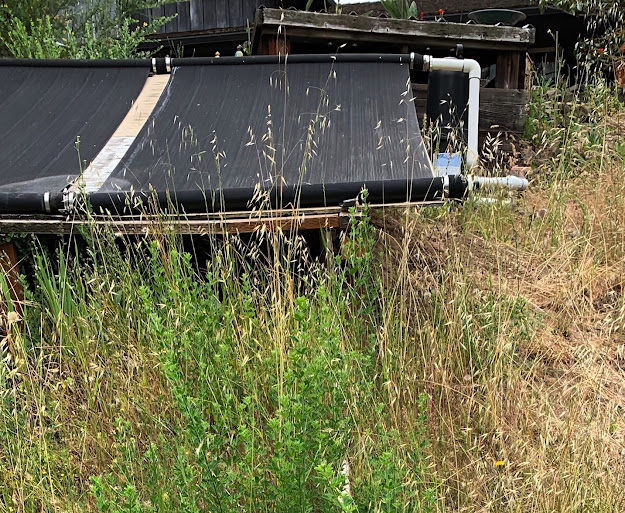
This is clearer if you look at the picture below. Note the old, white piping on the right hanging off the old array. Puts a lot of weight on the coupling to the panel when water is in it.
I debated and researched on how many posts I needed. The design rack design I found on the internet (above) says 102" was the maximum distance between posts. I figured better safe than sorry and decided that it probably needed to be 4 posts across the width and not 3.
So I put an extra 12" in the width for the design of the new rack. Call it 216" which would mean spacing them just under 69" apart. Call it 70".
So 4 posts in each row 70" apart and 2 rows 86" inches apart.
Museum worthy.
8 holes to dig.
I got to digging. Kathleen helped.
We hit multiple old pipes. Nothing is easy.
The first pipe, the metal one on top, delayed us 2 days while we attempted to trace it back to the house. Involved a metal detector, sight-lining and a lot of digging. Wasn't sure if it was water or gas. Long story short, it didn't matter, either way as it was abandoned, though we think it was gas.
The second collection of pipes were all PVC. We knew that before we bought the house there had been another solar array further along the hillside. Quickly established that these pipes were long abandoned. There were likely water to and from the old panels to the pump, plus a sensor line.
Really needed that spot for the post lest I have to do a substantial shifting of the array so I cut the PVC pipes. The dirt here was like concrete. Hours of digging.
And did I mention it was hot?
Finally got the holes prepped.
I had been designing, measuring and planning lumber purchases for over a week and was itching to start sinking posts.
One slightly tricky part of the design is addressing the slope of the panels. The slope should roughly match the latitude of their location. Here on the Monterey peninsula its about 36.6 degrees. Which means the panels should sit up at a 36 degree angle from the flat ground towards the south.
Hypothetically.
Practically that is quite steep and it means you miss a lot of sun as it passes earlier in the day. Measuring the old panels they look to be at about a 25 degree angle and pointing in about the right direction. After some consideration and more research I settled for 30 degrees.
Close enough for horseshoes and hand grenades.
There are many reasons that the angle of the array is important. A key reason is the design of the framework especially the how and where to put the posts.
Ah yes where I dug the holes for the posts.
I had dug the two rows of post holes about 86 inches apart...
WRONG.
On to phase 2.


Comments
We (you) also learn that whilst Completing The Project seems (is) imperative, once it is Done, the Fun is Over.
Except for that shovel work.
Shovels, like ladders, are to be avoided …. unless it is a coal scoop and you are raking out the stacks of doubloons from a heretofore unknown Gringott’s account.